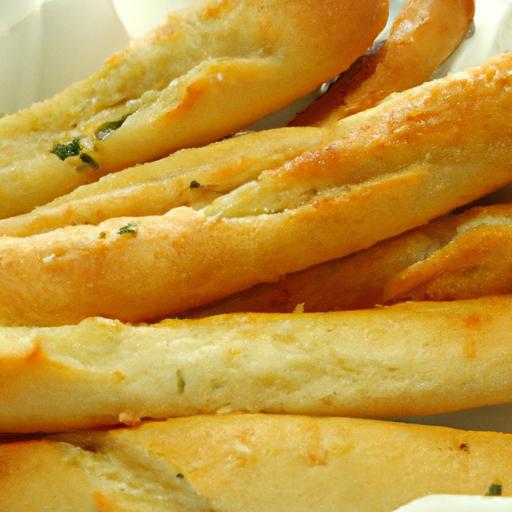


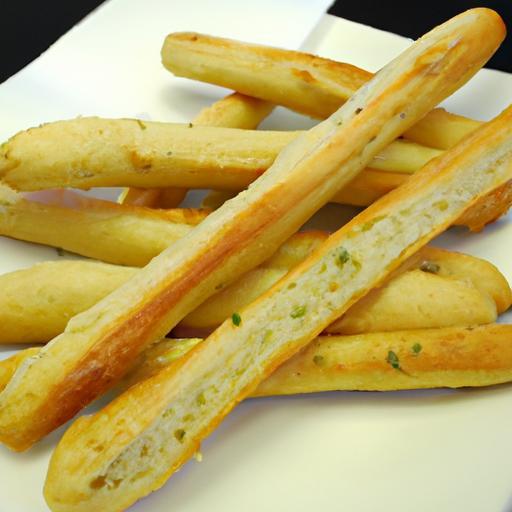
Ther’s something irresistibly comforting about the aroma of freshly baked bread, especially when it’s infused with the rich, savory essence of garlic and butter. Enter golden garlic breadsticks-a simple yet sensational treat that transforms humble dough into crispy, flavor-packed delights. Whether served alongside a hearty pasta dish or enjoyed as a standalone snack, these breadsticks offer a perfect balance of crunch and tenderness, with each bite bursting with garlicky goodness. In this article,we’ll explore a foolproof recipe that brings golden garlic breadsticks to life,guiding you step-by-step to achieve that coveted crispy exterior and soft,buttery interior that will have everyone reaching for more.
Golden garlic breadsticks delight with a mouthwatering balance of crisp exterior and tender crumb, making them an irresistible side or snack at any table. Achieving this perfect harmony starts with a thoughtfully crafted garlic butter blend that infuses every bite with rich, aromatic flavor. Rooted in classic Italian-American comfort food, these golden garlic breadsticks combine tradition with culinary finesse, ensuring each stick emerges gloriously golden and deeply savory-ideal for sharing or savoring solo.
Prep and Cook Time
- Preparation: 20 minutes
- Rising Time: 1 hour
- Baking: 15-18 minutes
- Total Time: Approximately 1 hour 40 minutes
Yield
Makes 12 perfectly crisp golden garlic breadsticks
Difficulty Level
Easy to Medium – Great for bakers with basic skills looking to impress!
Ingredients
- 2 ½ cups all-purpose flour, sifted
- 1 packet (2 ¼ tsp) active dry yeast
- 1 cup warm water (110°F/43°C)
- 1 tbsp granulated sugar
- 1 tsp salt
- 3 tbsp unsalted butter, melted
- 4 cloves garlic, finely minced
- 2 tbsp fresh parsley, finely chopped
- 1 tbsp extra virgin olive oil
- Optional: pinch of red pepper flakes for a subtle kick
Instructions
- Activate the yeast: In a small bowl, combine warm water, sugar, and yeast. Stir gently and let stand for 5-7 minutes until foamy, signaling active yeast.
- Mix and knead dough: in a large bowl, combine sifted flour and salt. Make a well in the center and pour in melted butter and yeast mixture. Stir with a wooden spoon until a shaggy dough forms.
- Knead thoroughly: Transfer dough to a floured surface. Knead vigorously for 8-10 minutes until smooth and elastic. Proper kneading develops gluten, crucial for that coveted soft-yet-chewy interior.
- Frist rise: Lightly oil a clean bowl, place dough inside, covering with a damp kitchen towel. Let rise in a warm spot for 1 hour or until doubled in size.
- Prepare garlic butter blend: While dough rises, gently warm olive oil in a small pan over low heat. Add minced garlic and sauté for 2-3 minutes until fragrant but not browned, preserving radiant garlic notes. Remove from heat and stir in chopped parsley.
- Shape breadsticks: Punch down risen dough and divide into 12 equal portions. roll each portion into a 6-8 inch slender stick, ensuring even thickness for uniform baking.
- Second rise: Place shaped breadsticks on a parchment-lined baking tray, spaced slightly apart. Cover loosely and let rise 20-30 minutes, enabling final puffiness.
- Brush with garlic butter: Generously brush each breadstick with the prepared garlic butter blend, coating every curve and crevice.
- Bake: Preheat oven to 400°F (205°C). Bake breadsticks on the middle rack for 15-18 minutes or until golden brown and crisp on the outside. Rotate tray halfway for even coloring.
- Final touch: Promptly after removing from oven, brush once more with reserved garlic butter for an intense, fresh garlic aroma and luscious shine. Optionally, sprinkle with flaky sea salt or extra parsley.
Tips for Success
- Use warm water and fresh yeast: Yeast temperature is key to a good rise, never exceed 115°F to avoid killing the yeast.
- Minced garlic vs. garlic powder: Fresh garlic creates a vibrant, natural flavor profile, critical for authentic golden garlic breadsticks.avoid pre-minced jars for best taste.
- Don’t skip the second rise: It’s essential for achieving a soft interior with a crunchy shell.
- Butter consistency: Melt gently-avoid browning it-to keep the garlic butter silky and bright.
- Make-ahead option: Prepare breadstick dough a day ahead, refrigerate overnight, then shape and bake fresh to save time.
Serving Suggestions
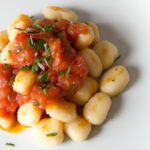
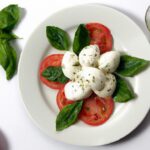
Serve your golden garlic breadsticks piping hot alongside a bowl of creamy tomato basil soup or a robust marinara dip. Garnish with a sprinkle of shredded Parmesan and a few fresh basil leaves for a resturant-worthy presentation. for a elegant twist, pair these breadsticks with a fresh, peppery arugula salad drizzled with lemon vinaigrette. Hosting a gathering? Offer an array of dips like roasted red pepper hummus or a mild pesto cream for guests to explore flavor combinations.
| Nutrient | Per Breadstick |
|---|---|
| Calories | 140 |
| Protein | 4g |
| Carbohydrates | 18g |
| Fat | 6g |
Related Recipe: Explore our Creamy Tomato Basil Soup for a perfect companion to these breadsticks.
For further reading on yeast dough techniques,visit the King Arthur Baking Guide, a trusted authority for home bakers worldwide.

Q&A
Q&A: Golden Garlic Breadsticks – A Crispy, Flavor-Packed Recipe
Q1: What makes these golden garlic breadsticks so special?
A1: These breadsticks are the perfect marriage of crispy, buttery exterior and soft, fluffy interior, all infused with rich garlic aroma and a hint of herbs. The golden crust delivers a satisfying crunch, while the garlicky flavor dances on your taste buds without overpowering the subtle bread sweetness.
Q2: What type of dough works best for crispy garlic breadsticks?
A2: A simple yeast dough enriched with a touch of olive oil and a pinch of sugar works beautifully here. The yeast creates air pockets that ensure a tender crumb inside, while the olive oil helps crisp the outside to that coveted golden finish.
Q3: How do I get that irresistible golden color?
A3: Brushing your breadsticks with a blend of melted butter and garlic just before baking-and again right after they come out of the oven-locks in moisture and adds shine. A sprinkle of freshly grated Parmesan or a dusting of paprika can also enhance that inviting golden hue.
Q4: Can I customize the flavor beyond garlic?
A4: Absolutely! Fresh herbs like rosemary, thyme, or oregano blend seamlessly with garlic for a fresh twist. You can also add a pinch of chili flakes for a subtle kick or a sprinkle of sesame seeds or everything bagel seasoning on top for extra texture.
Q5: What’s the best way to serve golden garlic breadsticks?
A5: These breadsticks shine as an appetizer alongside a robust tomato marinara or creamy Alfredo dip. They also make a delightful accompaniment to hearty soups,fresh salads,or even as a crunchy side to your favorite pasta dishes.
Q6: How do I store leftover breadsticks without losing their crispness?
A6: To keep breadsticks crispy, wrap them loosely in foil after they’ve cooled. For longer storage, freeze them in an airtight container. When ready to eat, reheat in a preheated oven at 350°F (175°C) for about 5-7 minutes to refresh their crunch.
Q7: Can these breadsticks be made gluten-free?
A7: Yes! Use a gluten-free flour blend formulated for bread baking and adjust the liquid ratios accordingly. While the texture may be slightly different, plenty of garlic flavor and a crisp crust can still be achieved with the right technique.
Q8: Is it necessary to let the dough rise?
A8: Absolutely. Allowing the dough to rise-typically for about an hour-develops flavor and creates those lovely air pockets that give breadsticks their signature lightness inside. Skipping this step could result in denser, less fluffy bread.
Q9: How can I boost the garlic flavor without it being too overpowering?
A9: Infuse melted butter with garlic gently warmed over low heat instead of raw minced garlic. This mellows the sharpness, creating a warm, nutty garlic flavor that envelops every bite but never overwhelms.
Q10: Are golden garlic breadsticks suitable as a snack on their own?
A10: Definitely! These breadsticks are endlessly snackable-crispy, aromatic, and satisfying without needing any accompaniment. They’re perfect for munching during a movie night or sharing at a casual gathering.
Enjoy baking these golden garlic breadsticks and transforming simple ingredients into a crispy, flavor-packed delight!
Future Outlook
Whether you’re craving a crispy snack, a flavorful side, or a crowd-pleasing appetizer, these golden garlic breadsticks deliver on every front. Their irresistibly crunchy exterior and rich, buttery garlic essence make them a timeless favorite that’s as simple to make as it is satisfying to eat. So next time you want to elevate your meal or impress guests, reach for this recipe-because sometimes, the best moments are baked golden and dipped in garlic goodness. Happy baking!